
Why Does My Eyeliner Smudge? Common Causes and Easy Fixes
You carefully draw your eyeliner, step back from the mirror, and everything looks perfect. Then a few hours later, you notice a dark line across your eyelid—or a little smudge underneath your eyes that definitely wasn't there when you left the house.
If you've ever wondered, “Why does my eyeliner smudge so easily?”, you're not alone. Eyeliner can move throughout the day for several reasons, and the problem isn't always the eyeliner itself. Oily eyelids, skincare, eye shape, application technique, and even the amount of product you use can all make a difference.
The good news is that you don't need to give up on eyeliner. A few small changes can help your eye makeup stay cleaner and look more polished throughout the day.
Your Eyelids May Be More Oily Than You Think
One of the most common reasons eyeliner smudges is excess oil around the eyelids.
Even if the rest of your skin feels balanced, your eyelids can become oily as the day goes on. That oil can break down or move eyeliner, especially when the liner sits directly on the skin.
Before applying eye makeup, make sure your eyelids are clean and dry. If you've applied eye cream or moisturizer around the eye area, give it enough time to absorb before starting your makeup.
For particularly oily eyelids, a small amount of setting powder can create a smoother, less slippery surface for eyeliner.
The goal isn't to make your eyelids completely matte. You simply want to remove excess moisture and oil that could interfere with your makeup.
Too Much Skincare Can Affect Your Eyeliner
Skincare and makeup work best together when you give each layer enough time to settle.
A rich moisturizer, eye cream, or sunscreen applied too close to the lash line can leave behind a layer of product that makes eyeliner more likely to move. This can be especially noticeable with liquid eyeliner because it is applied directly along the lash line.
You don't need to skip your skincare routine. Instead, apply your products carefully and allow them to absorb before beginning your eye makeup.
If your eyelids still feel slightly slippery, gently blot away excess product with a clean tissue before applying eyeshadow or eyeliner.
Applying Eyeliner Over a Powdery or Uneven Base
Interestingly, eyeliner can also smudge when the area is too dry or covered with loose eyeshadow.
When eyeshadow collects around the lash line, eyeliner may not adhere evenly. Instead of creating a clean line, it can mix with powder and gradually become less defined.
After applying your eyeshadow, use a small clean brush to remove any excess powder from the lash line. Then apply your eyeliner.
This is particularly helpful when you're creating a smoky or blended eye look. Keeping the actual lash line relatively clean gives the eyeliner a better surface to sit on.
You're Applying Too Much Product
When eyeliner starts to look uneven, the natural reaction is often to add more.
Unfortunately, layering too much eyeliner can make the problem worse.
A thick layer takes longer to set and can transfer more easily when your eyelid folds or your lashes touch the skin. It can also make small imperfections much more noticeable.
For everyday makeup, try starting with a thin line close to the lashes. If you want a stronger look, build it gradually rather than drawing one very thick line.
This approach also gives you more control over the shape of your eyeliner.
Your Eye Shape Can Play a Role
Sometimes, smudging isn't caused by something you're doing wrong. It's simply related to the way your eyes are shaped.
Hooded eyelids, deep-set eyes, or naturally oily eyelids can cause the upper lid to come into contact with the eyeliner throughout the day. If this happens, even a carefully applied line can eventually transfer.
If you have hooded eyes, try keeping the eyeliner thinner along the inner and middle sections of the lash line. You can gradually build the outer corner and slightly lift the shape upward.
Instead of trying to force your eyeliner to look exactly like someone else's, adjust the placement to work with your own eye shape.
Give Your Eyeliner Enough Time to Set
Another simple but often overlooked step is letting your eyeliner dry.
Immediately after application, liquid eyeliner is still more vulnerable to movement. Blinking, touching your eyelid, or applying another product too quickly can disturb the line.
After drawing your eyeliner, keep your eyes relaxed for a few seconds and allow the formula to set before continuing with the rest of your makeup.
If you're applying mascara afterward, be especially careful not to let the mascara wand touch the freshly applied liner.
Choose a Formula That Fits Your Routine
If your eyeliner continues to smudge despite changing your technique, it may be worth looking at the formula you're using.
For everyday eye makeup, a liquid eyeliner with a precise applicator can make it easier to create a clean line without repeatedly going over the same area.
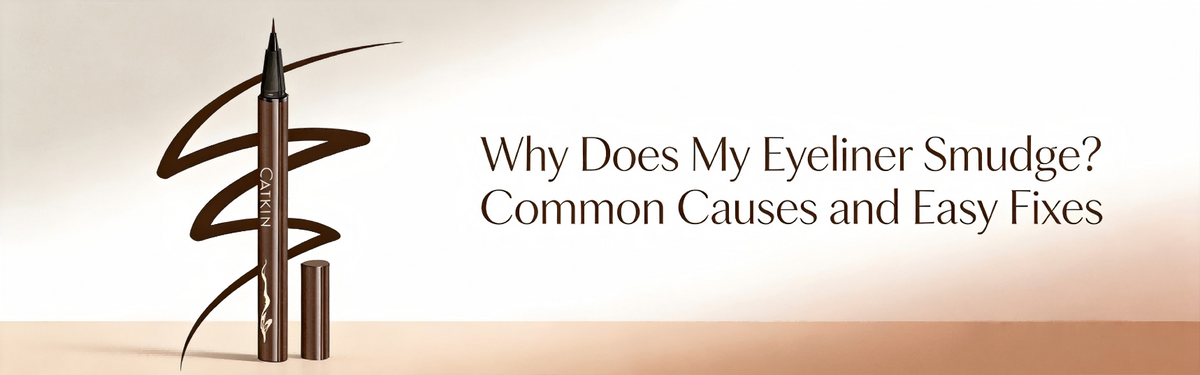
CATKIN Waterproof Liquid Eyeliner comes in black, brown, and blue, giving you options depending on the look you're creating. Black works well for a more defined eye, while brown can create a softer effect that pairs especially well with warm and earthy eyeshadow.
When applying it, keep the tip close to the lash line and work in small sections instead of trying to draw the entire line in one movement. This makes it easier to control both the thickness and shape.
Set Your Eyeliner for Extra Definition
If you know your eyelids tend to get oily, you can take one extra step to help your eyeliner stay looking neat.
After applying your eyeliner, use a small angled brush to gently press a similar-toned eyeshadow over the line. You don't need much. The idea is simply to reinforce the color and soften any harsh edges.
For a brown eyeliner look, for example, a matte brown eyeshadow can be lightly pressed along the liner. This works particularly well for softer everyday makeup and smoky eye looks.
Just remember that this technique is about adding a very thin layer—not covering the eyeliner with a lot of powder.
What to Do When Your Eyeliner Already Smudges
Even with the right preparation, the occasional smudge can still happen.
Instead of immediately wiping the area with your finger, let the makeup settle first. Then use a clean cotton swab or small brush to carefully remove the unwanted mark.
If the smudge has affected your foundation or concealer underneath the eye, gently clean the area before adding a tiny amount of concealer again. Avoid rubbing, since that can spread the pigment even further.
For a quick midday touch-up, less is usually more. A small correction often looks much cleaner than adding another thick layer of eyeliner.
A Cleaner Line Starts Before the Eyeliner
The secret to less smudging isn't necessarily a complicated makeup routine. It often comes down to what happens before you even pick up the eyeliner.
Keep the eyelid clean and dry, allow skincare to absorb, avoid excessive layers, and choose an application style that works with your eye shape. Then give the eyeliner enough time to set before moving on to the next step.
Once you understand what is causing your eyeliner to move, fixing it becomes much easier. And instead of constantly checking the mirror for smudges, you can focus on the part that makes eye makeup fun: experimenting with different shapes, colors, and looks.